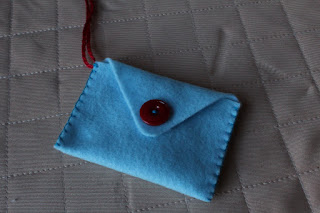
I have seen so many cute medicine pouch/peyote pouch necklaces on Pinterest and I think they are so cute but they're so small, what the heck would you put in them? I'm sure some people put crystals or their drugs or something like that in there, but I really wanted something more functional. I've always liked the idea of having something small to stash my ID, credit card, and some cash in when I go to a club or somewhere I don't want to carry a purse. So, I thought the medicine pouches would be cute converted into this purpose!
So without further ado, here are steps for you to make your own:
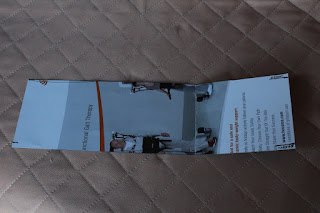
1. Create your pattern. You can do this by cutting a long strip of paper that is a little wider than your credit cards. My pattern length and width is exactly 3 1/8 inches by 10 3/4 inches if you just want to use that measurement.
 |
| Complex stuff, right? |
2. Cut your fabric. It would be useful to use a pinking shears if your fabric is prone to fray. This is not necessary with some fabrics like felt and leather. I used leather from a cheap old coat from a thrift store. This project is so small that all you need is scraps.
3. Fold up the bottom to create the pouch. You want to make sure you have right sides facing (i.e. the part you want to show on the outside is on the inside right now). At this point if you are using a fabric that frays you will want to create a hem at the top before sewing the side seams. You will not need to create a hem with fabrics that do not fray such as leather or felt.
 |
| Here is a loose weave wool and a linen shown right sides facing. I used a pinking shears to cut and created a hem on the op inside first before stitching the side seams. |
4. Sew up side seams. For mine, I used a 1/8 - 1/4 inch seam allowance. I know that this is small but a big seam allowance will make your pouch look bulky and will interfere with how much you can fit in it. I used a sewing machine, but this would also look cute hand sewn.
 |
| My side seams are sewn and right sides are still facing. |
5. Turn it right side out and cut/sew the flap the way you want it. To make it have that finished look, you may want to clip your corners and iron your seams open so that when you turn it right side out, you can iron it again with right sides out to have a flat polished look. Keep in mind that you cannot use an ion on leather or suede directly. I did not iron my leather pouch and it is fine, but if you really want to iron leather you will need to lay down another fabric on top of it.
 |
| This is the inside flap of one made of linen. I used a pinking shears to cut the fabric and I made a nice folded 1/8-1/4" hem. |
6. Create the loop to wear around your neck. For my leather one I chose just leather cording you can get at any craft store. I sewed it on the the flap nearest the opening and just tied a simple knot in the back. The knot looks kind of bulky but I don't even feel it when I'm wearing it and you don't see it so it's nice to have it be fully adjustable for length. For the pouches I made out of fabric, I braided or weaved floss and attached it in the same manner
 |
| Here you can see how I machine stitched on the leather cording. |
7. Create a closure of some kind. You can pretty much do this how ever you want. You could use a button and button hole, a button and a piece of twine to wrap around it, a bracelet closure, or just hang something heavy from the flap to keep it weighted down as I did with the leather pouch. Sometimes, simply making the front flap long is enough to keep it closed.
 |
| The flap of this pouch is enough to keep it closed while wearing. |
 |
| Button and button hole closure |
8. Embellish. You can put beads or embroidery on your pouch to give it that finishing touch. Sometimes it may be easier to do the embellishment first so that you do not have to worry about accidentally embroidering through multiple layers.
Note: The white and blue ones I showed have slightly different patterns than the leather one, but they still use the same ratio. I wanted one that had a fringe on the bottom so instead of folding over, I just used 2 different pieces of fabric, right sides facing, so that I basically sewed a tube. Then turned right sides out and sewed up the bottom. For the envelope one, I basically just increased the width of my original pattern and made sure it would fit around a few cards.


No comments:
Post a Comment